
Introducing Laddu Notion
Introducing “Laddu Notion”
Deploy a quick CRUD API service and Swagger API playground for your notion database. Good for building internal dashboards, mock api servers, 3rd party webhook integrations. Project is named after my cat “Laddu” 👇

The Need
Notion database is one of my goto no-code tool for managing data. But when it comes to building on top of notion database, there is not much support. So I came up the idea of creating crud api layer for notion database. This can be used for various purpose ranging from internal dashboards, mock api servers and 3rd party webhook integrations, etc. So I decided to build this for Netlify-Hashnode Hackathon
Tech Stack
- Next JS
- Tailwind CSS
- NotionDB Client
- Swagger UI
- Netlify Serverless
- Netlify Click to deploy button 😁
Netlify has good support for Next’s features including dynamic routes, API routes, etc. And the “Click to deploy” button integration made my project easy to setup.
Dev tooling
Used eslint and configured precommit hook to run eslint on every commit.
Netlify one click installation button
This project installation requires notion secret token to be configured. With Netlify Click to deploy button, we can configure our project to ask for netlify token during deployment by adding template.environment section with required environment variables to the netlify.toml file.
netlify.toml
[template.environment]
  NOTION_SECRET_KEY = "Enter your notion secret token"
Swagger documentation
With the help of next-swagger-doc npm package, It is very easy to setup a swagger ui page. The plugin takes swagger openapi spec as input and builds the interactive api playground.
pages/api-docs.js
import { createSwaggerSpec } from 'next-swagger-doc';
import SwaggerUI from 'swagger-ui-react';
import 'swagger-ui-react/swagger-ui.css';
import apiSpec from '../openapi.json';


const ApiDoc = ({ spec }) => {
    return <SwaggerUI spec={spec} />;
};

export const getStaticProps = async ctx => {
    const spec = createSwaggerSpec({
        definition: apiSpec,
    });
    return {
        props: {
            spec,
        },
    };
};

export default ApiDoc;
How to Deploy?
Step 1: Create Notion Integration
- Goto https://www.notion.so/my-integrations
- Click on new integration
- Give it a name and choose respective notion workspace
- Click submit
- Copy “Internal Integration Token”
Step 2: Share database
- Share your databases with the notion integration
Setup 3: Deploy in Netlify
![]()
Now visit your NETLIFY-URL/api-docs to use swagger api playground.
Demo
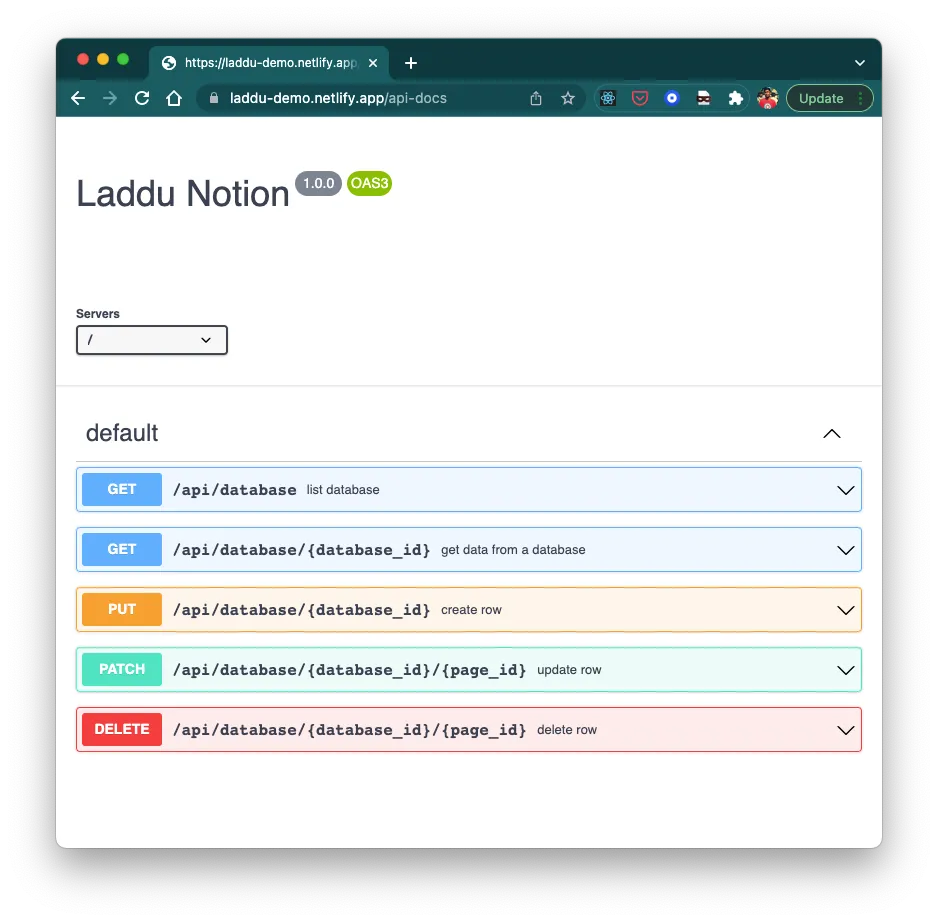 Demo URL: https://laddu-demo.netlify.app/api-docs
What did I learn?
- Learnt nextjs apis and tailwind. I am mostly a python guy. But this project is best built with javascript.
- dev tooling setup with nextjs was quite easy to setup eslint and precommit
- Netlify serveless functions
- Swagger UI integration was fun!
Links
Feel free to connect with me on Twitter or LinkedIn and let me know your thoughts on this project.
Subscribe to my newsletter
Get new posts delivered straight to your inbox.